Sunday, June 29, 2014

Headband


It's pretty simple to make. Buy any stretchy material and you will need to measure it to be the right length to go around your head when it is folded and twisted. You'll see what I mean...

The width of my headbands were about 6 inches. It is NOT perfect or straight, I just eye balled it and cut, not much measuring. 

So then I got the ends together and stitched a zigzag stitch across on my sewing machine real quick. 


After you do that, turn that inside out and you should have a really long piece of fabric like this. Now I'll show you how you put it on...

Hold it both hands like this.

Twist your wrist around one complete twist or else it won't work. 


Bring the two ends in your hands together like this.

You should have a headband now and you should be able to see the cool twisty looking part.
Make sure that twisty is in the front and stretch that over your head.

Fix it a little.

All done!

Same thing for the orange one. The orange one was a little bit longer though because the material wasn't as stretchy. It just depends on how stretchy your material is. 


And here's me modeling the orange one!


...And my sister!

Office Chair Redo

So I went yard sale-ing all morning one saturday until I finally came upon this old office chair for $8!


I got my dad to get all of his fancy tools out to take it apart. You just have to take it apart so that all the plastic parts that you want painted are apart from the cushions. Then, you spray paint all of the plastic pieces. 


For the fabric parts, you will need spray adhesive to spray all over the cushion part. This way, your chair will keep its shape when your new fabric lays on top. Now, on the back sides you will need to use a staple gun all the way around the edges to hold the fabric down. 


After all your paint is dry, you're ready to put the chair back together!


Sunday, June 15, 2014

Chevron Stool


I got this old stool at a yard sale for free!


If you want to do a design like the one I did, I would suggest using paint and a brush instead of spray paint. We had already bought spray paint at the store and later realized that we should have gone with the other paint because it was difficult to cover the other sections while we spray painted one section.

We first sanded down the stool completely so that it was nice and smooth. I then started by painting the blue sections. It was best to do this first because these sections would be the easiest to cover when we spray paint the rest of it later.


It didn't take long for the blue to dry.. Only about 20-30 minutes. Next, we painted the green legs. We used a grocery bag and cut it up into pieces that would cover these blue pegs. I used frog paint to keep these down and put the edges of the tape with the edge of the peg.  I also got a whole grocery bag and covered the top circle of the stool so that would not get sprayed with green. 

I removed the plastic bag covers just a few minutes after spraying the legs green. I let the green dry for another 20-30 minutes. 
The next step is to cover the entire stool except for the top circle where the black and white chevron goes. We got a large kitchen trash bag and cut the bottom open. We used frog tape to tape the trash bag to the very edges of the blue rim. You will have to use bits and pieces of frog tape instead of one long one so that you have a perfect circle shape when you paint it. The rest of the trash bag hangs over the rest of the stool so that it doesn't get sprayed with black or white paint.
After the tape was secure and the rest of the stool was covered, I spray painted the whole top circle white. I waited for that to dry for about 30-45 minutes. 
Then, I used frog tape and cut them into 2 1/2" strips so my chevron stripes would look even. I put them down on the white paint in a chevron pattern and spray painted with black. I let it dry for just a few minutes before removing the tape. Then, I could remove all tape and and the trash bag and I was done!


Thursday, December 26, 2013

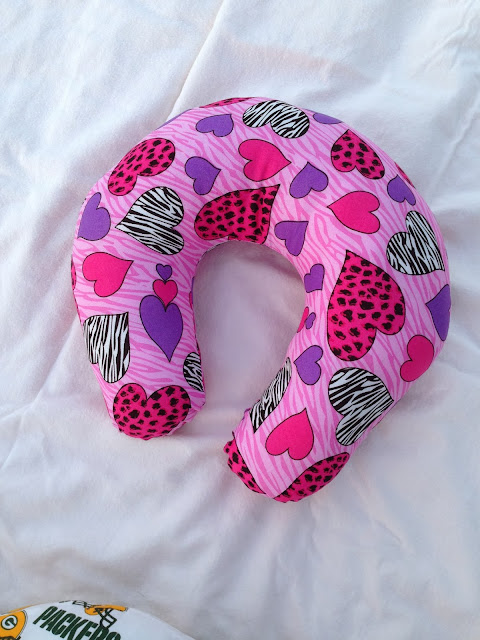
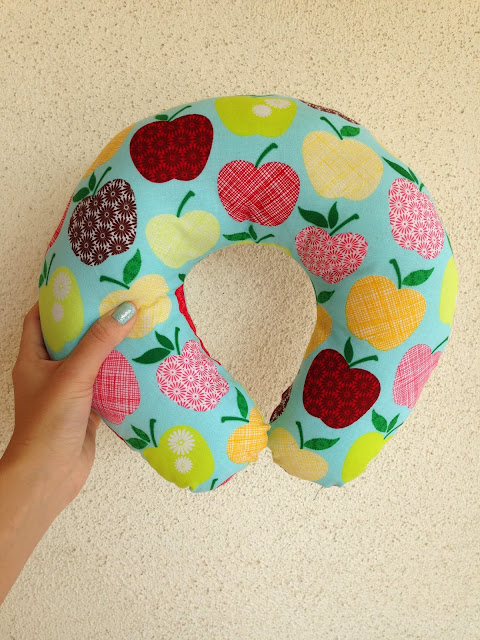
Neck Pillows


I made neck pillows for everyone in my family for christmas!


I used pattern 3283 from Kwik Sew


Sunday, December 22, 2013

DIY Magazine Picture Frame


I used tons of old magazine pages for this.  It took tape and hot glue gun to keep them rolled up! I placed the picture down on a piece of card stock paper and glued rolled up magazine pages around it.  Mod Podge was the finishing touch on top of the rolled up magazines.  Better explanation with more pictures coming soon!

Saturday, December 21, 2013

Christmas Tags


These are the Christmas tags I made with my cricut!
I purchased the digital Very Merry Tags Seasonal Cartridge from the cricut website and I was able to use it immediately. 


First you have to cut out the top layer piece with one color of paper.  


Then, you have to cut out the bottom layer piece.  I chose white for this piece.  


I made red ones too!


I used a glue stick to glue the white piece on.  


Sunday, December 8, 2013

Burlap Chevron Pillow

I combined many different ideas from Pinterest to make this pillow.


First I made a heart pattern the way I wanted it to look.  I just drew one on a piece of white paper.  I cut it out then traced it onto the three pieces of fabrics using a sharpie to make the three different colored hearts.  

This is the embroidery floss I used to stitch the hearts onto the strip of burlap.  I used a large needle to do this.  Those are the three jewels that will be going into the center of the hearts.  

I only used a tiny piece of this strip of burlap.  

I pinned each heart down onto the burlap as I stitched them on with the string.  I doubled the string when i stitched it to give it a thicker look.  There is a big knot on the bad side.  The plain burlap is not attached to the chevron burlap here.  I just worked on top of it.  Just stitch over under over under all the way around the heart.  

After all three hearts were stitched on, I added the jewels to the center of each heart.  I did this using the embroidery floss again for a stronger hold.  These jewels have loops to sew through.  

I tied knots on the bad side to hold the string in place.  After everything was in place, I went to my sewing machine and stitched this piece of burlap right on top of the chevron burlap because it was fraying pretty badly.  Then, I went back and stitched big stitches with the orange embroidery floss and the large needle around the rectangle burlap as you can see it in the finished pillow.  This orange string doesn't really hold it in place, I just wanted to add a little extra to it!

The bows don't hold anything in place either, I just added them to make it cuter! All I did was tie a knot around the jewel with an extra piece of string.  After the knot, I added a dab of fabric glue then tied it into a bow.  The glue will keep the bows from coming out when you tug on the strings that hang down.